Phone:
850-370-9074
Physical address:
Freeport, FL USA
Phone:
850-370-9074
Physical address:
Freeport, FL USA
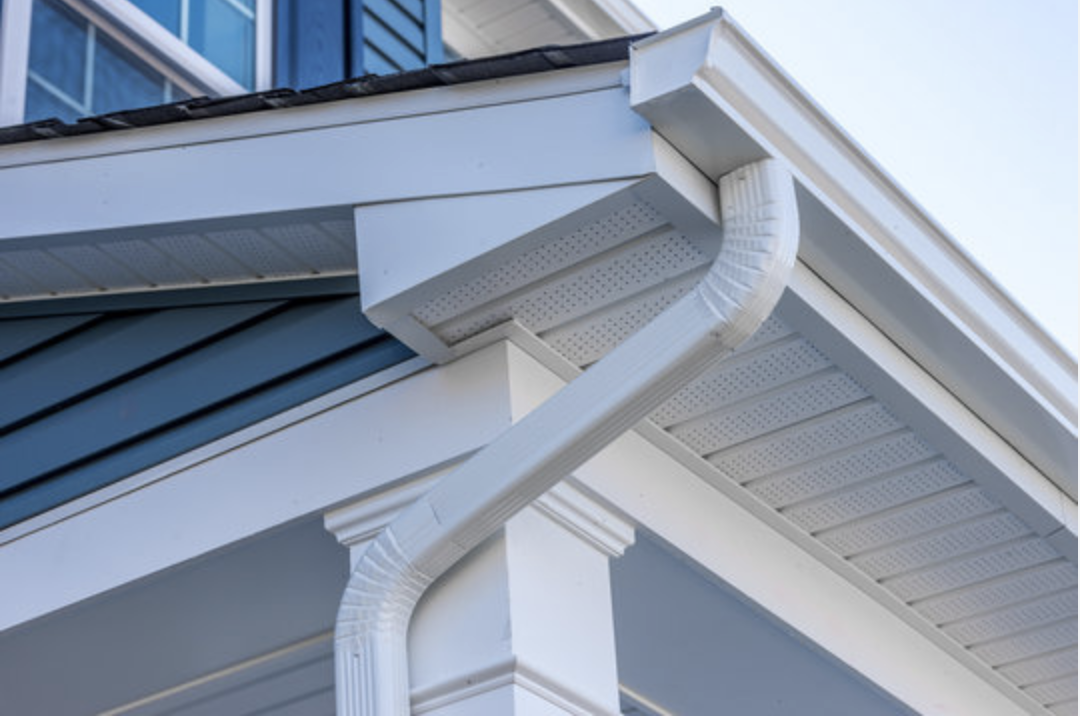
Here in Florida we get rain. Lots of rain. Rain gutters can often be overlooked but installing gutters is a critical home maintenance investment that can protect your home’s foundation, prevent flooding, and safeguard landscaping from water damage for years to come. Oceans PM believes that proper rain gutter installation ensures that water is effectively channeled away from your house, preventing costly issues like erosion and water intrusion as well as fascia wood rot damage. In this comprehensive guide, Oceans PM will walk you through the steps of installing gutters correctly, from planning and preparation to installation and maintenance. Let’s dive in!
Before you begin installing gutters, it’s essential to plan the project thoroughly. This involves calculating the required materials, choosing the right type of gutters, and ensuring you have the necessary tools.
The first step is to choose the type of gutter that suits your home. The most common types are:
When it comes to sizing, gutters typically come in 5-inch and 6-inch widths. We recommend choosing the wider gutters to collect as much water as possible. In other areas of the US where rainfall is less, 5-inch gutters can be sufficient, but when live in an area with heavy rainfall like we do here in the Florida Panhandle, 6-inch gutters are a better choice.
Rain gutters need to slope toward the downspouts to ensure proper drainage. The recommended slope is 1/4 inch for every 10 feet of gutter. Mark the high and low points of the gutter line using chalk or a pencil. The high point should be at the end farthest from the downspout. Also it’s important to make sure the gutters are mounted in alignment to the drip edge, this will prevent future fascia wood rot.
You’ll need the following materials and tools for the installation:
With your materials and tools ready, it’s time to start the installation process. Follow these steps carefully to ensure a successful installation.
Before attaching the gutters, install gutter flashing along the edge of the roof. This metal strip prevents water from seeping behind the gutters and damaging the fascia board. Nail the flashing in place, ensuring it extends under the shingles and over the fascia board.
Using a chalk line, mark the slope line along the fascia board. This line will guide the placement of the gutters and ensure they slope correctly. Start at the highest point (where the downspout will be installed) and snap the chalk line to the lowest point.
Measure the length of each section of the fascia board and cut the gutters accordingly. Use a hacksaw or miter saw for clean, precise cuts. If your gutters are made of metal, be sure to file down any sharp edges after cutting.
Gutter hangers or brackets are used to support the gutters. These should be installed along the marked gutter line, spaced every 24 to 36 inches. Start by placing the first hanger at the highest point and then work your way down. Use screws to secure the hangers to the fascia board.
With the hangers in place, you can start assembling the gutters. Begin by attaching the end caps to the ends of the gutters using gutter sealant. Then, attach corner pieces and downspout outlets where necessary. Apply gutter sealant to all seams to prevent leaks.
Carefully lift the assembled gutters and hook them onto the installed hangers or brackets. Ensure the gutters are positioned along the marked slope line and securely fastened. If necessary, adjust the hangers to achieve the correct slope.
Downspouts are crucial for directing water away from the house. Attach them to the downspout outlets using screws. Use elbows and extensions as needed to route the downspouts away from the foundation. Secure the downspouts to the house with brackets, spacing them every 8 to 10 feet.
After the gutters and downspouts are installed, perform a few final checks and make adjustments if needed. Then, set up a maintenance plan to keep your gutters functioning properly.
Use a level to check that the gutters are sloped correctly. Water should flow smoothly toward the downspouts without pooling. Adjust the hangers or brackets as necessary to achieve the proper slope.
Run water through the gutters using a hose to check for leaks. Pay close attention to seams, end caps, and corners. If you find any leaks, apply additional gutter sealant to seal them.
Gutter guards are a great addition to prevent leaves and debris from clogging your gutters. They come in various styles, including mesh screens and foam inserts. Install them according to the manufacturer’s instructions.
Here at Oceans PM, we believe preventive maintenance reduces future problems. To ensure your gutters remain in good condition, you should perform regular maintenance (or let Ocean’s take care of this for you). Some of the gutter maintenance we suggest is:
Installing gutters involves working at heights and handling sharp materials. Keep these safety tips in mind:
Oceans PM believes that correctly installing rain gutters is essential for protecting your home from water damage and flooding. By following the steps outlined in this guide, you can ensure a proper installation that effectively channels water away from your house. Remember to plan carefully, gather the necessary materials and tools, and follow safety precautions throughout the process. Regular maintenance will keep your gutters functioning smoothly, preserving the integrity and value of your home for years to come.
Oceans Property Maintenance – Oceans PM services Greater Destin, Miramar Beach, Seaside, Freeport, Niceville, Crestview, Rosemary Beach and all of 30A. We provide complete home services for your Airbnb, vacation rental, and or residential property. We provide Brazilian painting, pavers, gutters, fences, screens or a monthly maintenance package. We even provide dog waste removal through Dog Scoopers and trash can to curb service. Ocean’s property Maintenance can help so you can rest easy knowing your home is take care of.
Oceans PM can arrange all your maintenance needs
Text or Call us today on 850-370-9074